Tuesday, November 27, 2012

Lemon-Cayenne Tea for Colds


Today's topic / recipe is all about colds. Cold and flu season is once again upon us, although it's really hard to believe here in Florida (it's 76 degrees outside right now).

Preventing a cold
I'm sure everyone has their way of preventing a cold, whether it's an obsession with Lysol and antibacterial hand-gels, or popping zinc pills every time a sniffle is witnessed. Personally, I prefer to end my day with a nice hot mug of lemon tea, with honey and cayenne pepper added. Not only is it delicious and soothing, one cup packs a walloping amount of vitamin C and other incredibly beneficial antioxidants. This is undoubtedly "the little mugful that could." All together, the ingredients work together to strengthen your immune system, cleanse your digestive track, reduce inflammation and hydrate your body.

Helping fight a cold
And if you already have a cold? Help your body fight it with this tea each morning and evening. Dayquil, Nyquil and the like help you by lessening and masking the symptoms of a cold - not by fighting it. This tea on the other hand replenishes your body to help you recover more quickly. Naturally. And tastily. 

This is as simple as it gets!
Lemon, Honey & Cayenne Tea
I don't know if this can technically be called "tea," being as no tea leaves are involved. Oh well.

Water
Fresh Lemon Juice, preferably organic
Honey, preferably natural
Cayenne Pepper

Heat a mugful of water to a nice hot sipping temperature. Then add in a bit of honey (1-2 t), the juice of half a lemon and a dash of cayenne (easy does it!). Stir together with a spoon until the honey is completely dissolved. Some of the cayenne may float on the top, making your first few sips surprisingly spicy. Don't leave the cayenne out though, it's an excellent source of Vitamins A, C, E, K, B6, Magnesium and Iron.

The honey and the lemon should balance each other. If it's too tangy, add more honey. Too sweet, add more juice.

Enjoy!
Riboflavin, Niacin, Iron, Magnesium and Potassium, and a very good source of Dietary Fiber, Vitamin A, Vitamin C, Vitamin E (Alpha Tocopherol), Vitamin K, Vitamin B6 and Manganese.

Read More http://nutritiondata.self.com/facts/spices-and-herbs/201/2#ixzz2DRsQpZAP
Riboflavin, Niacin, Iron, Magnesium and Potassium, and a very good source of Dietary Fiber, Vitamin A, Vitamin C, Vitamin E (Alpha Tocopherol), Vitamin K, Vitamin B6 and Manganese.

Read More http://nutritiondata.self.com/facts/spices-and-herbs/201/2#ixzz2DRsQpZAP

Thursday, November 15, 2012

The Ultimate Citrus-Herb Salad Dressing


A note about homemade dressings
I remember when I was younger watching an episode of Rachel Ray's Thirty Minute Meals, before I had even started to explore in the kitchen. As usual, she made her own salad dressing and encouraged viewers to make homemade dressings as well. I remember thinking "yeah right," at the impracticality of making dressings versus buying one. Oh, how things change. I haven't purchased a bottle of salad dressing in years (and yes, I do eat a lot of salad).

To me, the best part about making your own salad dressings it that you get to control the acidity levels. If I've made a rich, slow-roasted dish I'm going to want a punchier acidic dressing to balance it. If I've made a more acidic dish, I can take the exact same dressing and alter it to be more light and mellow.

So please - start making your own dressings! It's addicting, loads healthier and much more flavorful.

Citrus-Herb (Bonefish) Dressing
If you've ever been to the Bonefish Grill and had their house salad, I'm sure you noticed the killer citrus-y dressing they use. This is my take on their dressing. It has a bigger citrus kick and a bit more warmth from the extra garlic. Try it, alter it, and make it how you like it.

I just added this photo because I think it's beautiful. It doesn't get better than garlic, citrus and herbs!

I use the zest of both lemon and lime. If you're new to zesting, make sure not to zest the white pith under the skin. It'll add a bitter taste to your dressing. You just want to take the top, colorful layer of skin.

When using garlic in a salad dressing, you'll want to "paste" it, as to prevent your diners from chewing on crunchy pieces of garlic. Peel the cloves by giving them a good whack with your knife (carefully!), then finely mince. Add a pinch of salt to the minced garlic and (#3) use the flat edge of your knife to crush the garlic while pulling your knife towards you. Repeat until garlic is transparent (#4).
Here you can see all the "dry" components. Pasted garlic, lemon & lime zest, fresh cilantro and parsley, sugar and coarse-grain dijion mustard. The mustard is your emulsifier, and will hold the dressing together after you incorporate the oil. I use coarse grain because I love the look of the tiny globes in the dressing. Regular dijon works just as well; there is no taste difference between the two.
Here's the final dressing. You can see the flecks of acid suspended in the oil, and the beautiful little specks of the coarse grain dijon floating around. Give the dressing a taste, and adjust to your liking.

This is my husband's favorite salad to have the dressing with, especially after a workout. Protein and fiber packed, and more flavor than you can wag your finger at. Spicy pan-seared shrimp, black beans, avocado, red onion and toasted walnuts on arugula.  And yes, those crunchy salad strips. If you're going to add them, try and buy a natural or organic brand. Always make a conscious effort to avoid preservatives.
 
Citrus-Herb Salad Dressing

1 t fresh garlic (1-2 cloves), pasted
Zest of half a lemon
Zest of half a lime
1 T fresh minced parsley
1 T fresh minced cilantro
1 T Dijon mustard
¼ cup sugar
Juice of half a lemon
Juice of half a lime
Salt & Pepper, good pinch of each
1/3 - 2/3 cup of a light oil (I prefer Grapeseed oil)

Mix all of the ingredients together up through the salt and pepper. I take a quick taste here to check the balance between the sugar and the citrus juice, and the level of seasoning. Slowly whisk in your oil (about 1/3 cup) until the mixture emulsifies. Taste. Keep slowly incorporating additional oil and tasting until you achieve the balance you’re looking for. It should be bright, fresh and light on your palette.

--

I encourage anyone who doesn’t cook by taste, to start learning how. It’s simply all about learning how to make the slightest adjustments to take a dish to the next level.

Too citrusy? Add sugar. You want the perfect combo of sweet & sour.
Too strong? Add oil. The dressing should be light and fresh tasting, not heavy.
Kind of bland? Add a pinch of salt and additional squeeze of lemon.
Not emulsifying? Whisk faster. (Ha)

--

Let me know below how it goes!

Monday, November 12, 2012

Broiled Chicken Thighs with a Balsamic Garlic-Butter


This is an incredibly easy and flavorful meal, and one you can have on the table in under 30 minutes. The reason it packs such a flavorful punch in such a short period of time is owed entirely to the use of fresh, natural quality ingredients.

Chicken thighs - Thighs are a very flavorful cut due to their fat content, and they stand up well to the quick cooking of the broiler.

Aged balsamic vinegar - Always buy aged balsamic vinegar, preferably 4 years or older. As it ages, most often in oak barrels, it becomes much more complex, full-bodied and sweet. 

Fresh produce - Don't expect massive flavor contributions from dried herbs, pre-minced garlic and pre-ground black pepper. The fresh ingredients include so many more flavorful oils, extracted just before you incorporate them into your dish.

The pictured balsamic vinegar is only about $2-3 more than an non-aged balsamic at general grocery stores, but has an exceptionally more complex and sweet taste. Make sure to invest in a bottle, you won't regret it. For this recipe I used rosemary, but you can easily switch it out for thyme. Both have deep and earthy flavors. I encourage you to grow your own organic herbs - most are extremely low maintenance (especially rosemary).

You may have a hard time pulling your face away from the sauce after you add the garlic and herbs to your melted butter. The smell is incredible. They should make candles that smell like that.
You can see the sauce turns a nice nutty brown after the balsamic vinegar is added. For this photoshoot, I used skinless bone-in thighs, but any thighs will work. To make sure the chicken cooks evenly, turn every 5-8 minutes and baste with the pan jucies and sauce.
This dish falls on the richer side, so pairing it with a nice slightly acidic salad works very well. For this lunch, I tossed arugula in a fresh balsamic vinaigrette, and topped it with fresh tomatoes. I seasoned the tomatoes with sea salt, cracked black pepper and extra virgin olive oil. Even my husband, who doesn't normally like sliced tomatoes, gobbled them up with this meal.

Beautiful, crisp and juicy chicken thighs. So quick and easy!


I hope you try and enjoy this recipe! If you do, please let me know what you think of it!

--

Broiled Chicken Thighs with a Balsamic Garlic-Butter
Serves 4

4 chicken thighs
4 T natural salted butter
2-3 T fresh garlic, minced (about 4-5 cloves)
1 T fresh rosemary or thyme, minced
Coarse kosher or sea salt & freshly cracked black pepper
3 T aged balsamic vinegar

Pre-heat your broiler on high. Melt your butter in a small saucepan over medium-low heat. When melted, add in garlic, herbs and a large pinch (about 1/2 t) of both your salt and pepper. Let them meld for a minute, then whisk in your balsamic vinegar.

Place your chicken thighs in an oven-safe pan or casserole dish – something that has sides to keep the sauce from falling out. Spoon about half of the sauce over your thighs, and broil. Depending on whether you use bone-in or boneless, your thighs should take about 15-20 minutes. Every 5-8 minutes, pull the pan out, turn the chicken over and baste with the pan juices and sauce. When the chicken is almost cooked through, turn right side up and cover with remaining sauce from your original batch. Make sure the garlic and herbs decorate the top of the chicken – they’ll get nice and crisp in the last few minutes.

To tell if your chicken is done, pierce with a sharp knife to the middle. If the juices are clear, you’re ready.

Serve with a slightly acidic salad or side.


Friday, November 2, 2012

Tilapia with Lemon-Dill Sauce

When I visited Australia earlier this year, I had barramundi for the first time. Barramundi is a mild white fish, naturally found in the Indo-West Pacific region. Apparently there are some barramundi farms here in the States, but I've yet to see barramundi as an option at any butchers or fish shops (at least since I've become aware of it). 

The barramundi I had was fantastic, and was served with a lemon-dill cream sauce, inspiring the one I've made here. Normally I use dill in strong sauces to pair with the bold taste of salmon; however, because of the mildness of a white fish (tilapia here) you can really create a delightfully delicate sauce using dill.

The sauce needs a bit of white wine, so I used the white wine I actually had with my barramundi in Australia. It's called Crossings, and is a beautiful Sauvingnon Blanc from the Marlborough region of New Zealand. All my Australian friends tell me that no other region makes white wines as good as Marlborough. This bottle is about $11 - actually cheaper to purchase here than in Australia.

The dill I use in the sauce is home grown. For the same price as a grocery store package of fresh dill, you can buy a greater quantity at the Home Depot or Lowes to plant. Dill is fairly a low-maintenance herb.
For the sides, I chose roasted new potatoes and asparagus. Start your potatoes roasting first, then add the asparagus towards the end. They need much less time to cook. I roast them together on the same sheet.


Simply seasoned with sea salt, freshly cracked black pepper, smoked paprika and a touch of garlic powder. I love both the color and the slight smokiness the paprika lends the dish. No home should be without smoked paprika.
The sauce is a straightforward cream sauce, finished with mustard and butter. I use coarse-grain dijion mustard. There isn't a flavor difference, but I like to see the little globes of mustard seeds throughout the sauce.
Can't beat that color! Tilapia easily flakes when cooked through. It's best to have a fish spatula on hand to handle it when plating to prevent any breakups.

The final product! This meal easily comes together in under 30 minutes. I hope you give it a try!
I've divided the recipe below into the individual components. I'd suggest starting the vegetables first, then the sauce and finally the fish. If you time it right, they'll all finish up at the same time.
  -->
Tilapia with a Lemon-Dill Sauce & Roasted Vegetables
Serves 4

Tilapia
4 pieces of tilapia
Sea salt
Black pepper
Garlic powder
Smoked paprika
1-2 T olive oil

Pre-heat a pan on medium-high with the olive oil. Season your fish on one side. Be fairly light on the garlic powder, and liberally with the smoked paprika. When the pan is hot, place the tilapia in seasoned side down. Season the exposed side the same way. After 2-3 minutes, check the bottom of your tilapia. It should be golden-brown. Carefully turn each piece, and cook until down (another 2-3 minutes). Fish should easily flake and be fully opaque inside.  Serve immediately, with sauce.

Sauce
1 shallot, minced
1 T garlic (about 2 cloves), minced
Juice of one lemon
½ cup white wine
4 T chopped fresh dill
1 t dijon mustard
½ cup heavy cream
½ stick of butter, divided into cubes
Sea salt
Black pepper

In a small sauce pan, sweat the shallots and garlic in olive oil over medium-high heat. Season lightly with salt and pepper. When translucent, but not browned, add the lemon juice and white wine. Bring to a simmer and then stir in the fresh dill. Let this cook for about 2 minutes, then stir in the mustard and heavy cream. If you’re ready to serve, add the butter cubes one at a time, letting them meld into the sauce before adding the next. Check seasoning, adjust if needed and serve. If you’re not ready to serve at this point, put the sauce on very low heat, stirring occasionally. When ready, turn the heat to medium and begin the butter process.


Roasted Vegetables
New potatoes, quartered
Asparagus, trimmed
2 cloves garlic, thinly sliced
1 6-inch sprig of fresh rosemary, minced
Sea salt
Black pepper
1-2 T olive oil

Pre-heat your oven to 450° F. Place your quartered potatoes onto a baking sheet, along with the garlic and rosemary. Season with salt and pepper. Toss in the olive oil, making sure to even spread the garlic, rosemary and seasoning across all the potatoes. Roast for 10 minutes. Pull the cookie sheet, add the asparagus to one side. Season with salt and pepper and a little olive oil. Roll them around (Carefully! It’s hot!) to coat them in the seasoning, and return the pan to the oven. After 5-7 minutes, asparagus should be ready (still crisp, but cooked through, and the potatoes crispy on the outside, tender on the inside. Adjust cooking time as necessary.


Tuesday, October 30, 2012

Pulled Pork & Srirachi-Herb Sandiches

Growing up in North and South Carolina you learn a thing or two about barbeque. I prefer mine with a vinegar & red pepper based sauce, and the below recipes reflect that taste combination. 

Making pulled pork is actually quite easy. There are two main keys to a perfect barbequed pork roast every time. 1 - Cooking Temperature. Keep it in a consistent 215-225 F environment. Slow & steady definitely wins the race here. 2 - Use a thermometer that you can read without opening the grill or oven door. You'll be cooking the roast until it hits 200 degrees (yes, 200 degrees). It's going to take a while, and it'll take even longer if you keep opening the door to check the temperature. We'll save the door-opening-temperature-loss for mopping the roast.

This beauty was a 8.9 lb bone-in picnic roast for under $11. If you want an affordable way to feed a passel of people, you can't beat the flavor and value of pulled pork. A "picnic" roast is the whole shoulder of the pig. It includes the "butt" section that you can buy separately at the store. The butt is a fattier piece than the shoulder, so pulling them together results in a less fatty end result. Don't worry though, there is still plenty there.

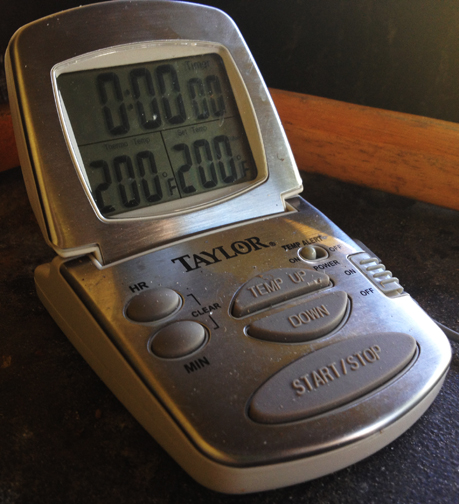
Low and slow. I keep my roast between 215-225 F (100-120 C).


I do my smoking in a Traeger, which is an electric smoker that burns wood pellets to create the smoke and heat. Any grill, smoker or oven will work, as long as you can maintain temperature (remember - key number one!)
200 degrees at last! For my 8.9 pounder, this took 16 hours, which breaks down to about an hour and forty minutes per pound. Generally, it's about 1.5-2 hours per pound, depending on the thickness, not the weight.


At 200 degrees, the pork will be falling of the bone and super juicy. Simply use a fork (or two) to pull it apart. No knives required for this!
Now that the pork is pulled - simply add your favorite sauce. It's great by itself, served with stone-ground butter grits and toast. Always make enough to have leftovers - it freezes exceptionally well and can be used in a multitude of different ways as a leftover - such as the below Srirachi-herb sandwich.

Sriracha is an Asian hot sauce made of chili peppers, garlic, vinegar, sugar and salt. The mixture of sriracha and mayonnaise, combined with fresh mint and basil, is a fantastic flavor combination.The spicy-freshness pairs extremely well with the vinegary bite of the rich pulled pork.

This sandwich needs a hearty, chewy bread that can stand up to the bold flavors of its contents. I like using an entire baguette to make a giant sub-sandwich for picnics and boat trips. Besides being visually stunning, it wins you extra-cool points when you show up with a sandwich-sword.

Extra bonus! Any furry friends of yours will be extra excited when the pork hits 200, and the bones slide right out. This is my new kitten Mam, experiencing her first pork bone. I think she likes it.


Elizabeth’s Pulled Pork
Pork Roast (Whole Picnic, Boston Butt, Shoulder)
Dry Rub (optional)
BBQ Sauce

(Easy enough, right?)

If your pork roast has skin on it, carefully remove it with a sharp knife. Skin cooked this low-and-slow will be edible, but more chewy than crispy. Save it for flavoring another dish, or making fried pork skins later. If you choose to leave the skin, make sure to score it lightly. Trim the fat cap as necessary, but leave it up to ¼” thick. You’ll cook the roast fat cap up, making the fat slowly render down into the meat (flavor, flavor, flavor). Coat with dry rub (optional). Insert a thermometer into the middle of the roast, careful to not touch a bone. Place the roast into smoker, grill or oven that has been heated to 215-225 degrees F. Occasionally mop the pork with the barbeque sauce (also a good time to steal a quick nibble of crust). Remove the pork when the internal temperature reads 200 degrees F, about 1.5-2 hours per pound. Let the pork rest, covered, for 10-15 minutes. Then pull away! Liberally douse with barbeque sauce and serve.

Dry Rub
The pork will be flavorful enough on it’s own, and especially after the addition of the barbeque sauce at the end. However, if you’re like me and love a good crust to nibble on, go ahead and add the dry rub to the roast.

1 part salt
1 part garlic powder
1 part hot paprika
2 parts sugar (preferably unrefined)
½ part black pepper, freshly ground
½ part of ground ginger (trust me)

Mix well, and coat roast.

Barbeque Sauce
1 cup of apple cider vinegar
1/2 cup of distilled white vinegar
1 T hot sauce
2 T sugar (again, preferably unrefined)
1 T salt
2 T crushed red pepper flakes
2 t black pepper, freshly ground
1 T butter, softened (optional)

Place all of the ingredients into a jar and give them a good shaking. Let the sauce sit for at least three days prior to use, for optimal flavor. The sauce will be good for months in the refrigerator. The butter, if added, will congeal in the fridge. If that makes you squeamish, let the sauce sit out a while prior to use. This recipe makes about 1.5 cups of sauce. I generally make a couple quarts at a time.

Pulled Pork Sriracha-Herb Sandwiches
Bread
Sriracha
Mayonnaise
2 parts fresh basil, minced
1 part fresh mint, minced
Pulled pork leftovers (vinegar sauced)

Mix sriracha and mayonnaise in a bowl together until you achieve the heat level you desire. My general ratio is about 1:4, but I like it pretty spicy. Liberally apply the sriracha-mayo to the bread of your choice. Add finely minced and mixed fresh herbs (the more the better – you can hardly see the mayo through the herbs on my sandwiches). Add the pork and enjoy!

The vinegar in the sauce is a crucial balancing point in the sandwich. If the barbeque sauce wasn’t your style, you can add some finely sliced pickled radishes or cabbage to help balance the flavors.

The End!

This was my first post ever. I think I may have gone a little overboard. It took me 3 hours. Let me know what you thought if you made it all the way through!